
How to use a proxy: from order to working connection
This page walks you through the basics: how to register, pick the right proxy type, place an order, and manage your proxies once they're active.
We own our servers and don't resell third-party infrastructure. Your proxies are ready within seconds after payment.
1 Registration
Registration takes under a minute. Two options: Google account or email.
How to create an account
- Open geekproxy.io/auth
- Click the "Sign up" tab
- Either click "Start with Google" or type in your email and click "Registration"
- Check your inbox for a confirmation email with login credentials
- Log in to your Dashboard
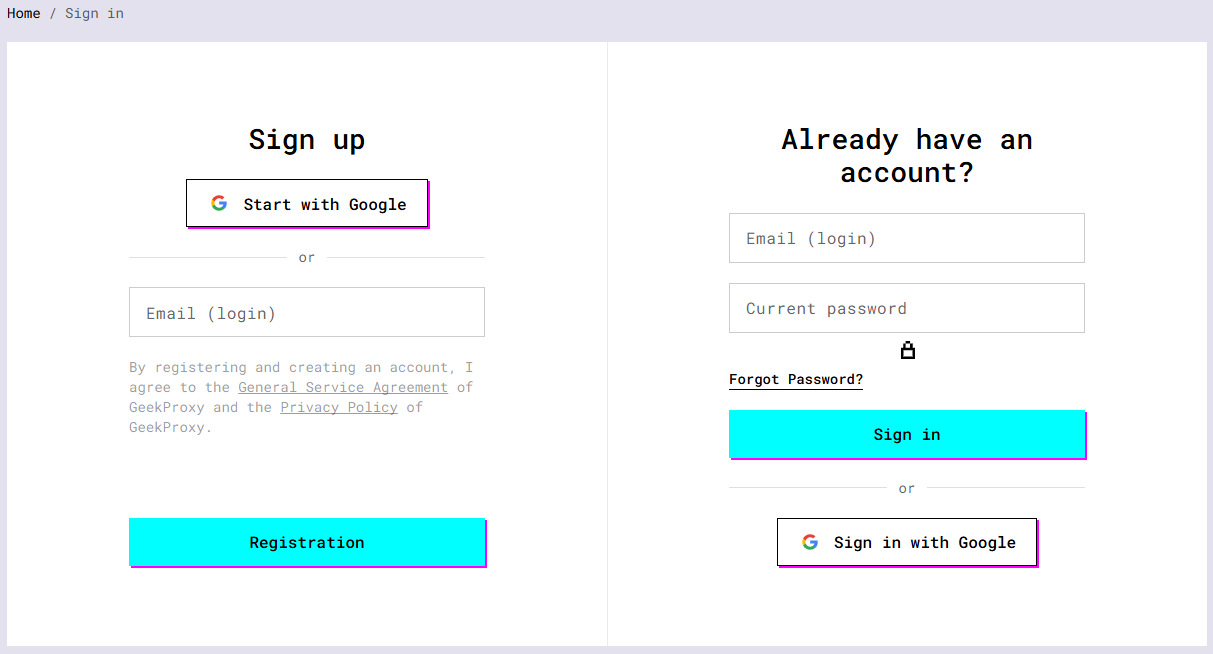
By registering you agree to the General Service Agreement and Privacy Policy.
2 Choosing a proxy type
We have two product lines. Here's the short version of what each does:
- Feature Residential Datacenter
- IP type Real residential IPs Dedicated and shared server IPs
- Speed High Very high
- Anonymity High Medium
- Works well for SMM, scraping, multi-accounting SEO, automation, bulk requests
- IP rotation Yes Static
- Locations 190+ countries 20+ countries
- Protocols HTTP, HTTPS, SOCKS5 HTTP, HTTPS, SOCKS5, Shadowsocks
If you're not sure, start with residential. They're compatible with most platforms and use cases.
3 Placing an order
Every product page has an order form on the right side. You can also order from your Dashboard after logging in.
How ordering works
- Go to a product page, for example Residential proxies
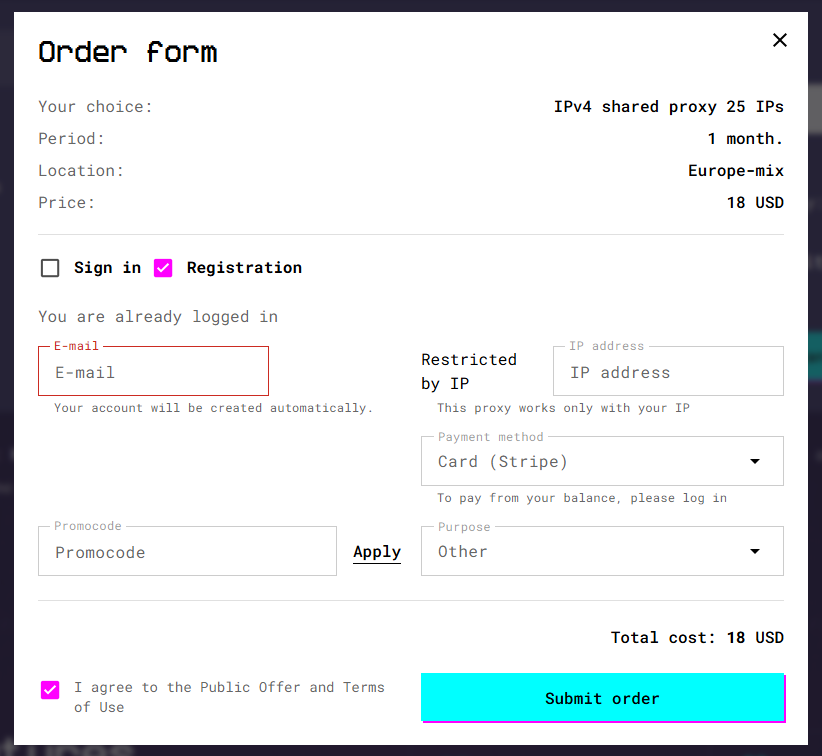
- In the order form, set up your package: number of IPs, subscription period (1 month, 3 months, etc.), and location
- Pick an authorization method. "Restricted by IP" lets you whitelist your IP without a password. "Login & Password" uses credentials instead
- Choose how to pay: crypto via Cryptomus (BTC, ETH, USDT), card via Stripe, or your account balance
- If you have a promo code, enter it and click "Apply"
- Select what you'll use the proxies for (Google, Facebook, scraping, etc.)
- Accept the Terms of Use and click "Submit order"
- Parameter Value
- Product Datacenter Dedicated
- IPs 10
- Period 1 month
- Location United States
- Auth type Login & Password
- Payment Crypto (USDT)
Proxies activate automatically after payment, usually within a few seconds. Credentials show up in your Dashboard and come to your email too.
4 Getting your credentials
After payment goes through, proxy details appear in your Dashboard right away.
Where to find them
- Log in to your Dashboard
- Open the Proxy Access section
- Your active packages are listed there with connection details:
- Field Description
- Host (IP) Proxy server address, e.g. 185.123.45.67
- Port Connection port, e.g. 12345
- Username Your login, e.g. user-12345
- Password Your password
- Protocol HTTP / HTTPS / SOCKS5 / Shadowsocks
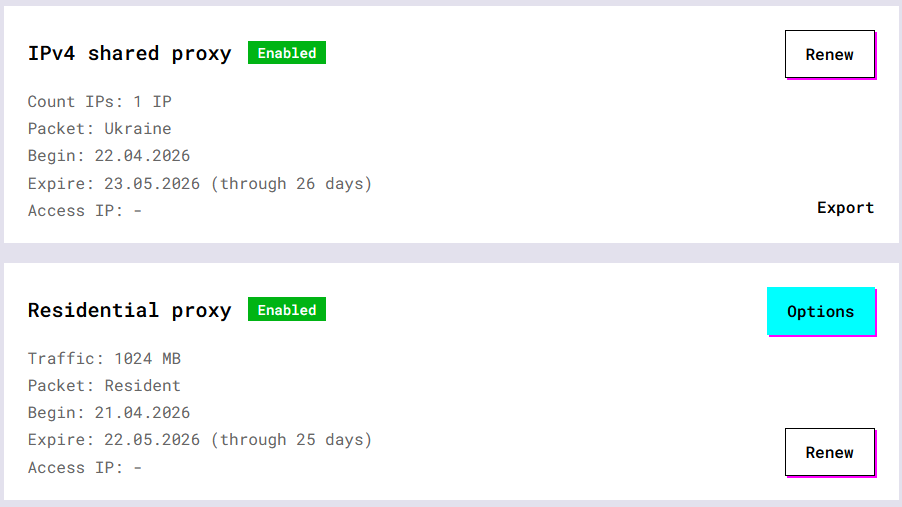
You can export credentials in bulk from the Dashboard. Formats: IP:Port:User:Pass, URL, and others.
5 Managing your package
All package management happens in the Dashboard. What you see depends on whether you bought residential or datacenter proxies.
What each package shows
Every package card in the Dashboard has:
- Status (Active, Expired, or Pending)
- Proxy type (Residential or Datacenter)
- Number of IPs
- Location
- Expiration date
- Traffic usage, if applicable
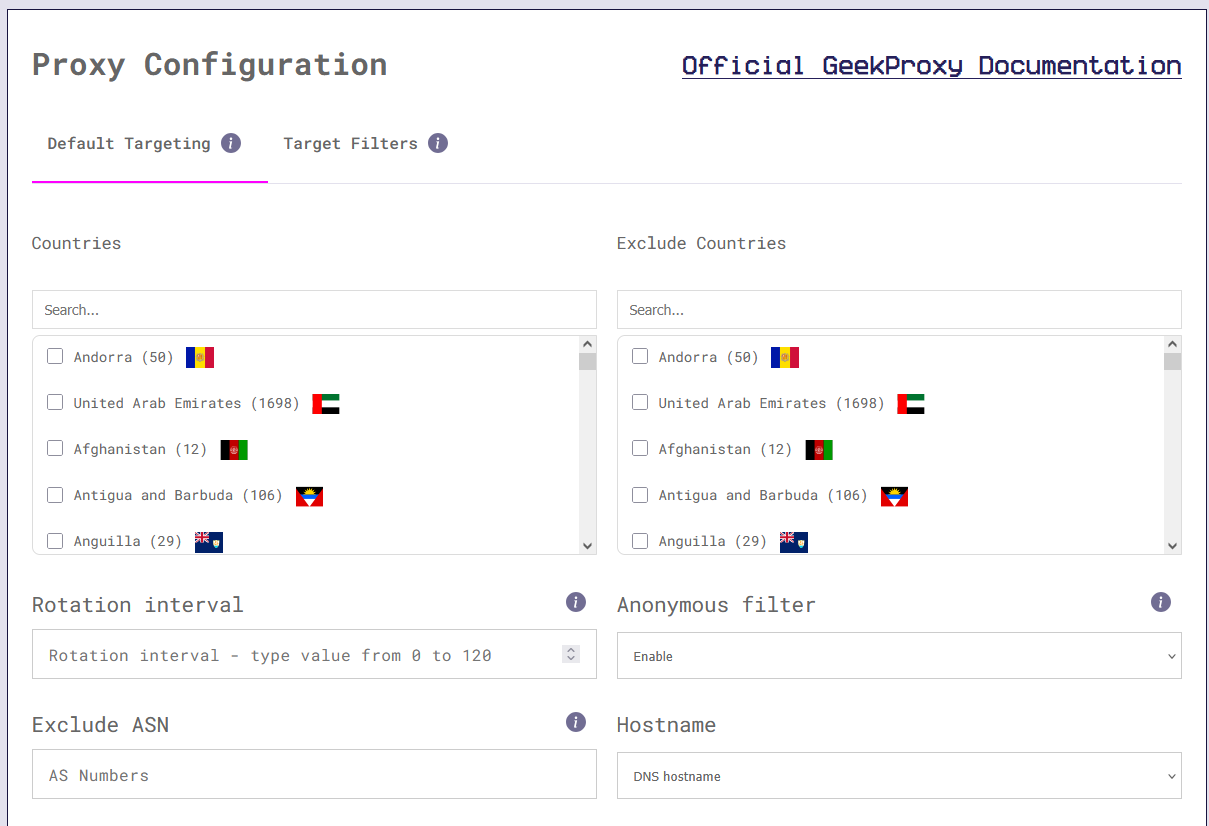
Residential proxies have an "Options" button
This is where all your residential proxy settings live. Click "Options" on your package to open the settings panel:
- Rotation: set how often IPs rotate (per request, by timer, or sticky sessions)
- Geo-targeting: pick specific countries, regions, or cities
- Protocol: switch between HTTP, HTTPS, or SOCKS5
- Session duration: how long a sticky IP stays assigned to you
- IP whitelist: manage which of your IPs are authorized to connect
Datacenter proxies: Proxy Access card
Datacenter packages show your proxy list directly: Host, Port, Username, Password for each IP. You can copy them one by one or export everything at once.
Renewing
- Go to your Dashboard
- Find the package
- Click "Renew"
- Pick a new period and confirm payment
Renew before the expiration date if you want to keep the same IPs. Once a package expires, those IPs may go to someone else.
Traffic usage
Residential plans are traffic-based. You can track how much bandwidth you've used in the Dashboard:
- Traffic Usage card shows used vs. remaining bandwidth
Switching authorization method
You can change between IP whitelisting and login/password any time:
- Open the package in your Dashboard
- Go to the Authorization section
- Switch to IP Whitelist or Login & Password
- Save. Changes apply instantly
6 Connecting your proxies
GeekProxy works with HTTP, HTTPS, SOCKS5, and Shadowsocks. That covers most software out there.
Where people use our proxies
- Browsers: Chrome, Firefox, or extensions like FoxyProxy
- Anti-detect browsers: Dolphin, Octo Browser, GoLogin, AdsPower, Incogniton
- AI agents and LLMs: web research, data collection, autonomous browsing
- Scripts and dev tools: Python requests, Node.js, curl, custom HTTP/SOCKS5 code
- Automation and testing: Selenium, Puppeteer, Playwright, ZennoPoster
- SEO and marketing: Key Collector, Screaming Frog, Keitaro, Binom
- SMM: Postmypost, SMMplanner, Tooligram
We have setup guides for 30+ apps on the Integrations page, including Chrome and Firefox.
Quick connection test
To check that your proxy is working:
- Open a browser with the proxy enabled
- Go to any IP-check website
- The IP shown should match the one from your Dashboard
7 Support
If something doesn't work or you have questions, here's how to reach us:
- Live chat on the website (bottom-right corner)
- Telegram: @geekproxy_helpbot
- Discord: discord.gg/B8tEbMtU
- Email: contacts page
We're running a 50%+ discount for early users right now. Check any product page for current pricing.
Try it out
Proxies activate within seconds after payment.